Barcode4NET and Crystal Reports
This tutorial presents how to display barcodes, created with Barcode4NET, in Crystal Reports. |
|
Requirements
Before starting to work on this tutorial, make sure the following items are available:
- Barcode4NET toolkit, any of Windows Forms & Mobile Devices or .Net editions.
- Visual Studio .Net 2003 or Visual Studio .Net 2005
- MS SQL 2000 + Northwind database (other data sources can work as well).
Building the Vendors report
| Please follow the steps in the sequence they are presented in order for this tutorial to work. The tutorial uses Visual Studio .Net 2003 but the steps are the same for Visual Studio .Net 2005. |
1. Start Visual Studio .Net 2003 and create a new Windows Forms application. Add a reference to barcode4net.dll.
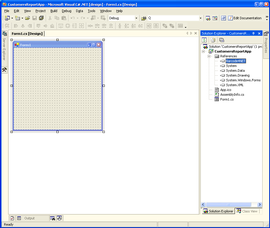
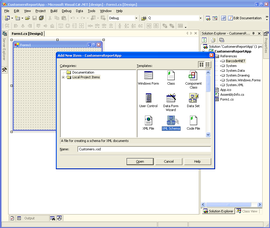
2. Using the Project menu (Project > Add new item...), add a new XML schema to the application.
Name the schema Customers.xsd.
| In order to add barcodes to Crystal Reports you will need a XML schema for the data that will be displayed in the report. The XML schema is used only during the design of the report and it is used to design the report and define the fields that will be displayed. |
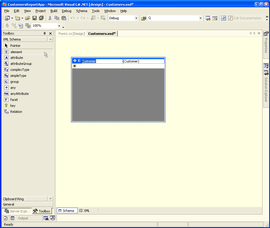
3. Make sure the XML schema is in design mode. Select the Element object in the toolbox and drag it on the schema. Name the element "Customer".
4. Add the following fields to the Customer element:
CompanyName - string
Address - string
City - string
PostalCode - string
Country - string
CustomerIDBarcode - base64Binary
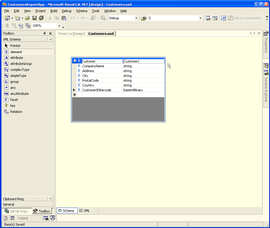
Save the XML Schema.
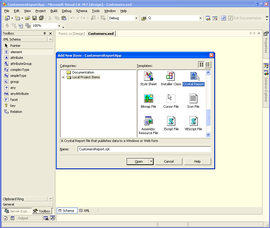
5. Using the Project menu (Project > Add new item...), add a blank Crystal Report to the application. Name the report CustomersReport.rpt.
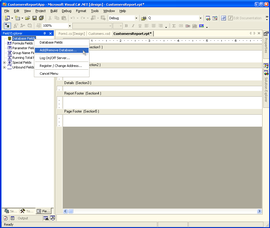
6. Make sure the report is in design mode. Right click on Database Fields item on the left and select Add/Remove Database... from the context menu.
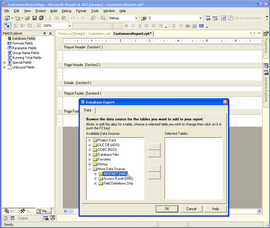
7. Expand More Data Sources item and select ADO.NET (XML).
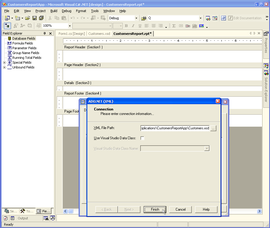
8. Expand the ADO.NET (XML) node and type the path to Customers.xsd file in XML File Path field and then click Finish.
9. Select Customer table in Available Data Sources list and move it to Selected Tables list by clicking the > button.
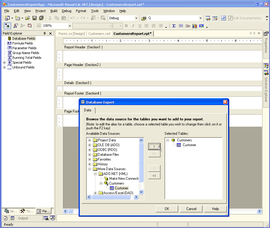
Click OK to save the selection.
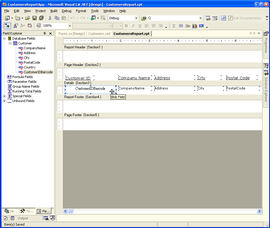
10. Make sure the report is displayed in design mode. Expand the Database fields item on the left and drag the fields in the Details section of the report.
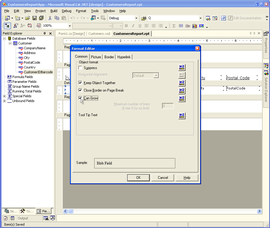
11. Right click on CustomerIDBarcode field and select Format from the context menu. In Format Editor window select Can grow option.
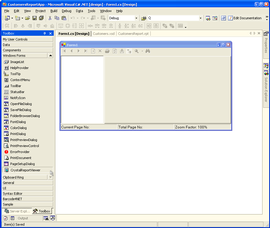
12. Display the application's main form in design mode. Select the CrystalReportViewer component in the toolbox and drag it on the form.
13. Open the application's main form source code file and import/use the following namespaces:
C#:
using System.Data.SqlClient;
using O2S.Barcode4NET; |
VB.NET:
Imports System.Data
Imports System.Data.SqlClient
Imports O2S.Barcode4NET |
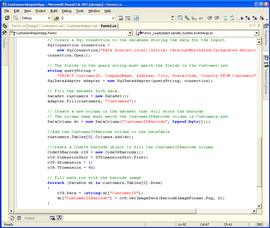
Type the following code in the Form load event handler:
C#:
// Create a Sql connection to the database storing the data for the report
SqlConnection connection =
new SqlConnection("Data Source=(local);Initial Catalog=Northwind;Integrated Security=True");
connection.Open();
// The fields in the query string must match the fields in the Customer.xsd
string queryString =
"SELECT CustomerID, CompanyName, Address, City, PostalCode, Country FROM Customers";
SqlDataAdapter adapter = new SqlDataAdapter(queryString, connection);
// Fill the dataset with data.
DataSet customers = new DataSet();
adapter.Fill(customers, "Customers");
// Create a new column in the dataset that will store the barcode
// The column name must match the CustomerIDBarcode column in Customers.xsd
DataColumn dc = new DataColumn("CustomerIDBarcode", typeof(byte[]));
//Add the CustomerIDBarcode column to the DataTable
customers.Tables[0].Columns.Add(dc);
//Create a Code39 barcode object to fill the CustomerIDBarcode column
Code39Barcode c39 = new Code39Barcode();
c39.DimensionUnit = XYDimensionUnit.Pixel;
c39.XDimension = 1;
c39.YDimension = 40;
// Fill each row with the barcode image
foreach (DataRow dr in customers.Tables[0].Rows)
{
c39.Data = (string)dr["CustomerID"];
dr["CustomerIDBarcode"] = c39.GetImageData(BarcodeImageFormat.Png, 0);
}
// Create the report and attach the data source
CustomersReport customersReport = new CustomersReport();
customersReport.SetDataSource(customers.Tables[0]);
// Display the report in the viewer
crystalReportViewer1.ReportSource = customersReport; |
VB.NET:
' Create a Sql connection to the database storing the data for the report
Dim connection As New SqlConnection("Data Source=(local);Initial Catalog=Northwind;Integrated Security=True")
connection.Open()
' The fields in the query string must match the fields in the Customer.xsd
Dim queryString As String = "SELECT CustomerID, CompanyName, Address, City, PostalCode, Country FROM Customers"
Dim adapter As New SqlDataAdapter(queryString, connection)
' Fill the dataset with data.
Dim customers As New DataSet
adapter.Fill(customers, "Customers")
' Create a new column in the dataset that will store the barcode
' The column name must match the CustomerIDBarcode column in Customers.xsd
Dim dc = New DataColumn("CustomerIDBarcode", GetType(Byte()))
' Add the CustomerIDBarcode column to the DataTable
customers.Tables(0).Columns.Add(dc)
' Create a Code39 barcode object to fill the CustomerIDBarcode column
Dim c39 As New Code39Barcode
c39.DimensionUnit = XYDimensionUnit.Pixel
c39.XDimension = 1
c39.YDimension = 40
' Fill each row with the barcode image
Dim dr As DataRow
For Each dr In customers.Tables(0).Rows
c39.Data = CType(dr("CustomerID"), String)
dr("CustomerIDBarcode") = c39.GetImageData(BarcodeImageFormat.Png, 0)
Next
' Create the report and attach the data source
Dim customersReport As New CustomersReport
customersReport.SetDataSource(customers.Tables(0))
' Display the report in the viewer
crystalReportViewer1.ReportSource = customersReport |
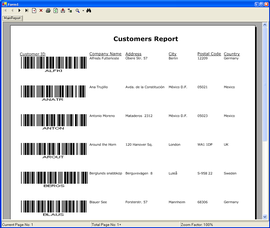
14. Compile the application and run it.
|
|
| NOTE: These tutorials provided here are for educational purposes only, to help
developers understand and use Barcode4NET toolkit more effectively. However,
they are provided AS-IS with not support or warranties expressed or implied. If
you discover a problem, send an email to techsupport@o2sol.com and we'll try to fix it. |
|