Barcode4NET and ASP.NET local reports
This tutorial presents how to display barcodes, created with Barcode4NET, in ASP.NET local reports. |
|
| Local reports, also known as RDLC reports (Report Definition Language Client-side processing), are a new type of reports that have been introduced in Visual Studio .Net 2005. They use the same definition language like the SQL Reporting Services reports, but they do not need the SQL Reporting Services complex infrastructure in order to run. The ReportViewer control take care of processing and displaying these reports. |
Requirements
Before starting to work on this tutorial, make sure the following items are available:
- Barcode4NET toolkit, any of ASP.NET & Reporting Services or .Net editions.
- Visual Studio .Net 2005
- MS SQL 2005 + AdventureWorks database (other data sources can work as well).
Building the Employees report
| Please follow the steps in the sequence they are presented in order for this tutorial to work. |
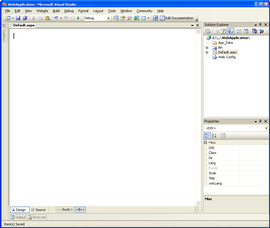
1. Start Visual Studio .Net 2005 and create a new website.
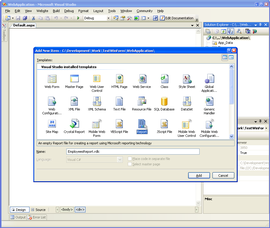
2. Using the Website menu (Website > Add new item...), add a new Report to the application. Name the report EmployeesReport.rdlc.
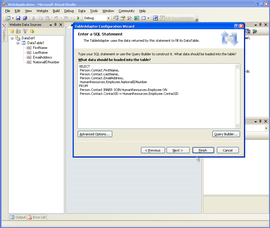
3. Add a new Data Source to the project and type the following code for reading the data from the database:
SELECT
Person.Contact.FirstName,
Person.Contact.LastName,
Person.Contact.EmailAddress,
HumanResources.Employee.NationalIDNumber
FROM
Person.Contact INNER JOIN
HumanResources.Employee ON
Person.Contact.ContactID = HumanResources.Employee.ContactID |
| This tutorial uses the AdventureWorks database that comes with MS SQL 2005. The Data Source that has been added to the project uses the Person.Contact and HumanResources.Employee tables that already exist in the database. |
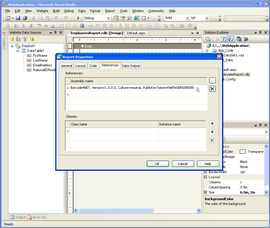
4. Make sure the report is opened in design mode. Using the Report menu, display the report properties (Report > Report properties...) and select the References tab. In the References list, click on the first empty line and type this:
Barcode4NET, Version=1.0.0.0, Culture=neutral, PublicKeyToken=fdeffed0f6085085
| IMPORTANT: Make sure that Barcod4NET.dll assembly (located in Bin\Net 2.0) is registered in Global Assembly Cache. If it is not registered, use the gacutil.exe utility to register the assembly in GAC. |
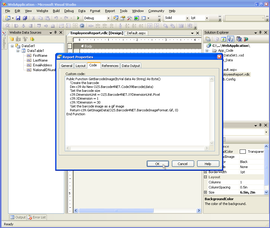
5. Select the Code tab and type the following function:
Public Function GetBarcodeImage(ByVal data As String) As Byte()
'Create the barcode
Dim c39 As New O2S.Barcode4NET.Code39Barcode(data)
'Set the barcode size
c39.DimensionUnit = O2S.Barcode4NET.XYDimensionUnit.Pixel
c39.XDimension = 1
c39.YDimension = 30
'Get the barcode image as a gif image
Return c39.GetImageData(O2S.Barcode4NET.BarcodeImageFormat.Gif, 0)
End Function |
| This tutorial uses a Code 39 (Code 3 of 9) barcode, but ANY barcode symbology that is supported by Barcode4NET toolkit can be used. |
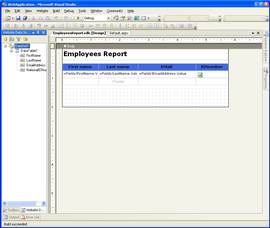
6. With the report opened in design mode, select the Table object in the toolbox and drag it on the report. Right click on the gray header and insert a new column. You should have now 4 columns. In the header row type First name in the 1st column, Last name in the 2nd column, EMail in the 3rd column and IDNumber in the 4th column.

7. Make sure the Data Sources window is visible and DataTable1 is expanded (like in Step 3 screenshot). Click on FirstName field and drag it on the details row in the 1st column. Click on LastName field and drag it on the details row in the 2nd column. Click on EMailAddress field and drag it on the details row in the 3nd column. Display the toolbox again, select the Image object and drag it on the details row in the 4th column.
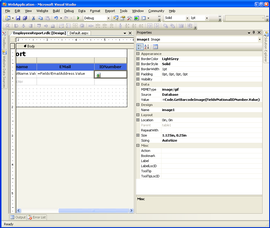
8. Select the Image object in IDNumber column and set its properties:
MIMEType = image/gif (the image format here must match the first parameter of GetImageData method in the code at Step 5)
Source = Database
Value = =Code.GetBarcodeImage(Fields!NationalIDNumber.Value) (the = sign must appear in front of Code keyword).
Sizing = AutoSize
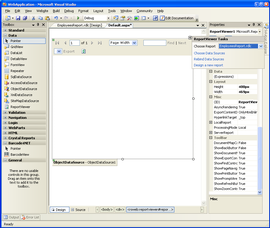
9. Display the application's default.aspx page in design mode. Select the ReportViewer control in the toolbox and drag it on the form. Select EmployeesReport to be displayed in the control.
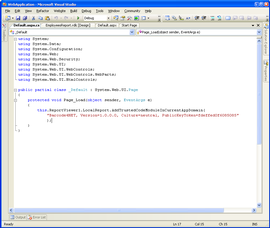
10. Add the following code line at the beginning of Form1_Load method:
C#:
reportViewer1.LocalReport.AddTrustedCodeModuleInCurrentAppDomain("Barcode4NET, Version=1.0.0.0, Culture=neutral, PublicKeyToken=fdeffed0f6085085"); |
VB.NET:
reportViewer1.LocalReport.AddTrustedCodeModuleInCurrentAppDomain("Barcode4NET, Version=1.0.0.0, Culture=neutral, PublicKeyToken=fdeffed0f6085085") |
11. Compile the website and run it.
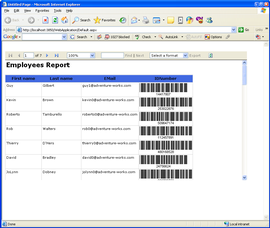
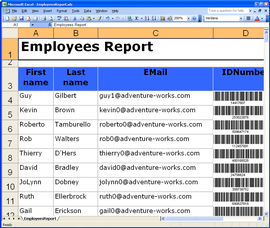
12. The report can be exported as PDF and Excel files and the barcodes are preserved.
EmployeesReport exported as a PDF document:

EmployeesReport exported as an Excel document:
|
|
| NOTE: These tutorials provided here are for educational purposes only, to help
developers understand and use Barcode4NET toolkit more effectively. However,
they are provided AS-IS with not support or warranties expressed or implied. If
you discover a problem, send an email to techsupport@o2sol.com and we'll try to fix it. |
|